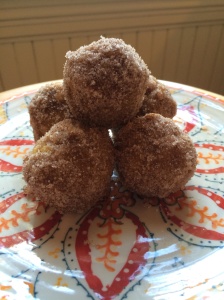
Pumpkin Mini Dirt Bombs

image

Hello! Long time no see/post/share…I really should change the name of this blog to Dort’s Annual Dish.

I wasn’t particularly up for baking today however the hubs decided to brew a batch of pumpkin beer last night and the leftover pumpkin purée was taunting me. Since I have been meaning to make a pumpkin version of my Dirt Bombs (check out the ancient post for more on those) I decided today was the day.

Thanks to the fab Two Peas and Their Pod for the recipe. (http://www.twopeasandtheirpod.com/baked-pumpkin-donut-holes/).

I had about 15 minutes to make these and experimenting with the original recipe wasn’t in the cards.

I’ll try to swing by and post some more fall treats and eats. It will probably be something apple because sorry pumpkin fanatics, apple will always be my first love of the season. Stay tuned 🙂

Here’s the yumminess:

Pumpkin Mini Dirt Bombs

1 3/4 cups all-purpose flour
2 teaspoons baking powder
1/2 teaspoon salt
1/2 teaspoons cinnamon
1/2 teaspoons nutmeg
1/2 teaspoon allspice
1/8 teaspoons ground cloves
1/3 cup canola oil
1/2 cup light brown sugar
1 large egg
1 teaspoon vanilla extract
3/4 cup canned plain pumpkin (not pumpkin pie filling)
1/2 cup milk

For coating:
4 tablespoons unsalted butter, melted
2/3 cup granulated sugar
2 tablespoons cinnamon

directions:
1. Preheat oven 350°F. Spray a 24-cup mini muffin tin with baking spray and set aside.

2. In a medium bowl, whisk together flour, baking powder, salt, cinnamon, nutmeg, allspice, and cloves. In a separate, large bowl whisk together oil, brown sugar, egg, vanilla, pumpkin and milk until smooth. Add dry ingredients to wet ingredients and mix until just combined.

3. Divide batter evenly among muffin cups. Bake for 10-12 minutes or until a toothpick comes out clean. (I ended up with about 30 total)

4. While the muffins bake, melt butter in one bowl and combine granulated sugar and cinnamon in another bowl. Remove muffins from oven and cool for 2 minutes. Dip each muffin in melted butter, then roll in cinnamon sugar to coat. Serve muffins warm or at room temperature.

Leave a comment

Filed under baked goods, Cooking

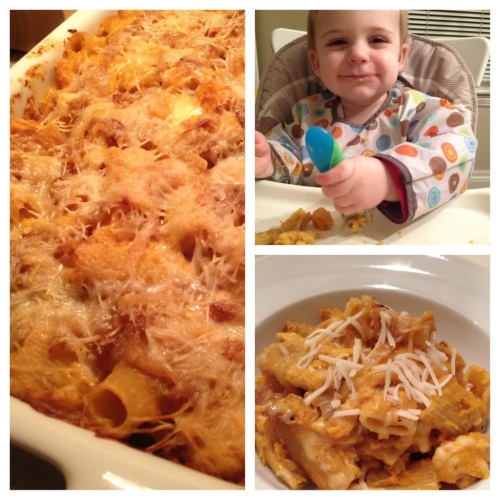
Butternut Squash so good even a toddler will eat it…at least mine did

20131023-200918.jpg

So it isn’t pumpkin but it is close. Butternut squash is another marvel of fall and winter cooking that I for one cannot live without. This dish has so many of my favorite things in it, I am salivating just writing this. Butternut squash, caramelized onions (I used Vidalia), cheese and pancetta! If these ingredients do not make you happy this may be the end of our relationship. 🙂 Or maybe you should try this recipe and see how you feel.
Some of my adjustments are leaving out the rosemary (I just am not a fan but have been meaning to try sage instead) and using light cream. I have included some tips/shortcuts at the end of this post to help make the recipe more manageable.

Disclaimer- this is not a quick weeknight meal. It can be done but give yourself time since once it is assembled it still needs 45 minutes in the oven. Make it up to one day ahead if needed.

Rigatoni with Squash and Caramelized Onions (from “Recipes” by Susan Spungen):

1 Pound Rigatoni
1 Large or 2 Small butternut squash (4lbs)
2 1/4in thick slices of Pancetta (4 ounces) cubed
3 garlic cloves, thinly sliced
1 Tbsp unsalted butter
2 large onions, halved and thickly sliced
Salt & pepper
1 Tbsp olive oil
2 Tbsp rosemary, finely chopped
1 1/2 Cups Chicken Or vegetable stock
1 1/2 Cups heavy cream
1 1/2 Cups grated Parmigiano-reggiano
1/2 pound fontina cheese, cut into 1/2 inch pieces

1. Bring water to boil and cook pasta according to package directions. Cook until al dente. Drain, rinse and set aside.

2. While water is boiling, peel and cut squash being sure to discard seeds. Cut into 3/4inch chunks. In a large sauté pan cook the cubed pancetta over medium high heat until browned. Approx 10 min. Remove with a slotted spoon and set aside.

3. Leaving 2 Tbsp of fat in the pan add the garlic and sauté until golden brown, stirring frequently, about 5 minutes. Add the butter and onions, cook until golden brown, approx 10 minutes. Reduce heat to low and sprinkle with salt and pepper. Add 1/4 cup of water, cover and cook 5 more minutes. Remove onions from pan and set aside.

4. Add olive oil, squash, half of the rosemary and 1/2 tsp salt and 1/4tsp pepper. Cook over high heat stirring frequently. Cook until tender, approx 10 min. Add the stock and bring to a boil; reduce to a simmer and cook until the liquid has been absorbed and squash is very tender. (8-10min). If the squash is not ready add a little water or more stock and cook for a few more minutes. Add the cream and bring to a boil for one minute. Remove from heat.

5. Transfer squash to a large bowl (the pasta pot) cool slightly. Add the pasta, half of the onions, the pancetta, 1 cup of Parmigiano-Reggiano, fontina and rosemary. Add additional salt and pepper to taste. Stir to combine and transfer to a 4 quart baking dish (lasagna pan). Sprinkle remaining onions and Parmigiano on top. (Cover and refrigerate if not baking right away)

6. Preheat oven to 350 and bake for about 45 minutes, until golden and bubbling.

Some helpful time-saving tips:
A. Make a day in advance or plan to cook for the first time on a weekend.
B. Purchase pre peeled/cubed squash as long as it looks fresh.
C. Roast squash on a cookie sheet tossed with olive oil and s&p for about 20min at 400. Then you can add it to the pan with the stock and cream.
D. Pre shredded Parmigiano-Reggiano. Fresh un-shredded is always best but unless you are cooking to impress the Queen or a professional Chef just save yourself the hassle.
E. cut some fat and try light cream or fat-free half and half

Leave a comment

Filed under Cooking

Pumpkin for my Pumpkins

Tis’ the season for pumpkin flavored goodness! I have noticed that as soon as September hits the pumpkin spice craze sweeps the country. It turns out I am not immune to this affliction. I thought I would whip up a simple and small (in quantity) treat to get the Fall season off to a tasty start. Below is a recipe from joyofbaking.com. In an attempt to make these a bit healthier I cut down the sugar from 1 cup to 3/4 and they turned out fine. Next time I may adjust other ingredients by adding some oats and removing some flour etc.

On a pumpkin side note, I wanted to make pumpkin pancakes for my toddler with the left over pumpkin this week. I was feeling lazy so my quick solution was to use instant pancake mix and add the left over pumpkin and less water than the box called for. I also added some cinnamon, cloves, nutmeg, ginger and a dash of honey. Voila! Quick pumpkin pancakes!

Pumpkin Chocolate Chip Muffins

1 1/2 cups All purpose flour

1 teaspoon Baking soda

1 teaspoon Ground Cinnamon

1/4 teaspoon Ground Ginger

1/4 teaspoon Ground Cloves

1/4 teaspoon Ground Nutmeg

1/2 teaspoon Salt

1/2 cup Unsalted butter, room temperature

1 cup Sugar

2 Large Eggs

1 teaspoon Pure vanilla extract

3/4 cup Canned pumpkin

1 cup Semi sweet chocolate chips

Preheat oven to 350 degrees. Line 12 muffin cups with paper liners or spray each cup with a non stick vegetable spray.

In a large bowl, sift together the flour, baking soda, spices, and salt.

In the bowl of your electric mixer, or with a hand mixer, cream the butter and sugar until light and fluffy. Add the eggs, one at a time, beating well after each addition. Beat in the vanilla extract. With the mixer on low speed, alternately add the flour mixture and pumpkin puree, in three additions, beginning and ending with the flour mixture. Fold in the chocolate chips.

Fill the muffin cups evenly with the batter using two spoons or an ice cream scoop. Place in the oven and bake for about 18 – 20 minutes, or until firm to the touch and a toothpick comes out clean.

Yield: 12 standard muffins (I could have squeaked out 13 or 14)

20130919-205031.jpg

Leave a comment

Filed under baked goods, Cooking

Makin’ Whoopie (Pies)

20130523-164744.jpg

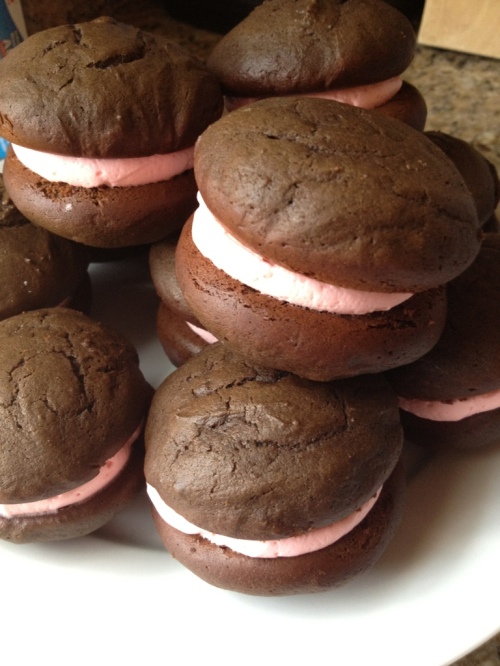
Who doesn’t love a whoopie pie?! My love of the whoopie began at summer camp as a kid. Since that time it has been cultivated by stuffing my face with whoopies of all flavors and sizes. If you are looking for a giant one check out Big G’s Deli in Winslow, Maine.

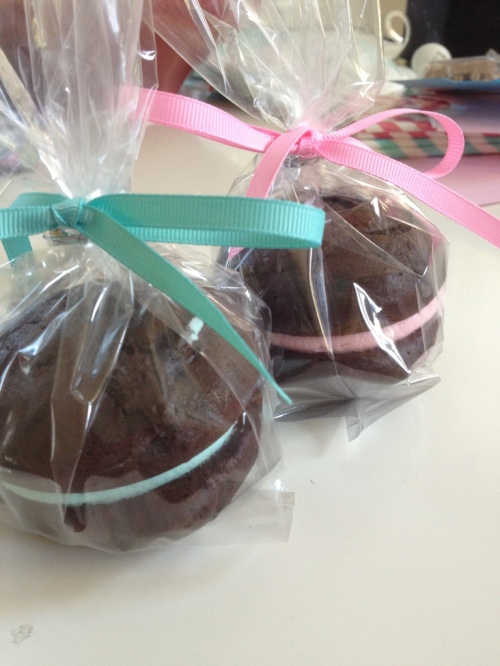
My sister recently had a baby shower and since we share half of our genetic make up she obviously loves a good whoopie. The result was whoopie pie favors. I went with the classic chocolate but dyed the filling pink and blue since the baby will be a surprise. As for the recipe I had to go with my all time favorite version courtesy of Martha Stewart. See her recipe below.

(Reposted from Marthastewart.com)

Ingredients:
3 1/2 cups all-purpose flour
1 teaspoon salt
1 1/2 cups unsweetened cocoa powder
1 tablespoon baking soda
1 teaspoon baking powder
1 cup (2 sticks) unsalted butter, room temperature
2 cups sugar
2 large eggs
2 cups buttermilk, room temperature
2 teaspoons pure vanilla extract

Filling Recipe follows

Directions

Preheat oven to 400 degrees. Sift together flour, salt, cocoa powder, baking soda, and baking powder. Set aside. Line two baking pans with Silpats (French nonstick baking mats) or parchment paper. In the bowl of an electric mixer fitted with the paddle attachment, cream butter and sugar until light and fluffy. Add eggs, buttermilk, and vanilla. Beat until well combined. Slowly add dry ingredients. Mix until combined.
Using a 1-ounce ice cream scoop, place cookies onto lined baking pans, 12 per pan. Bake for 12 minutes. Remove to a rack to cool. Repeat with remaining batter.
Spread 2 tablespoons frosting onto each of 24 cookies. Sandwich together with remaining 24 cookies.

Filling Ingredients:

1 cup (2 sticks) unsalted butter, room temperature
2 cups sifted confectioners’ sugar
1 jar (7 1/2 ounces) marshmallow Fluff
2 teaspoons pure vanilla extract
Directions

In the bowl of an electric mixer fitted with the paddle attachment, cream together butter and sugar until pale and fluffy, about 3 minutes. Add Fluff and vanilla and continue mixing until well combined.

Add food coloring if making these for a festive occasion. Using a pastry bag or zip top bag pipe approximately 2 tablespoons on to each bottom cookie.

20130523-165016.jpg

3 Comments

Filed under baked goods, Cooking

Anyone else craving Popovers?

20130402-153210.jpg

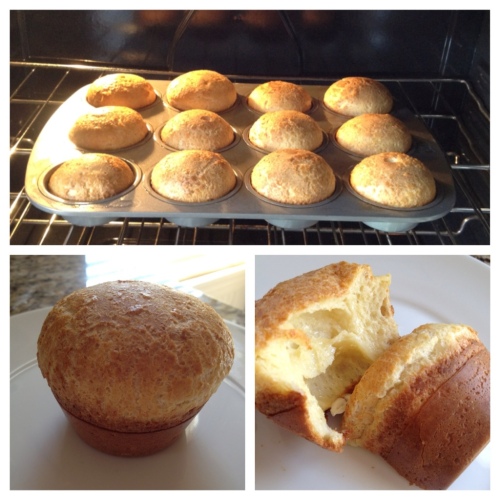
I have no idea why I wanted a popover so badly today. I can’t even remember the last time I ate one, 5? 10 years ago maybe. Lucky for me these are a very easy treat to whip up! Most of you probably have the necessary ingredients on hand at this moment. Lucky you! From my brief internet search I found the most important bits of info to be room temp or warm ingredients and no peeking once the oven door is closed. These really are easy and could be on your dinner table tonight. Throw in some cheddar and chives to amp them up or cover with butter and jam fresh from the oven like I just did. Enjoy! (full disclosure I have eaten 3 already and will probably go for number 4 after I finish this post)

Popovers

Ingredients:

4 Large (or 3 extra large) eggs at room temp
1 1/2 Cups Milk (skim, 2% or other) At room temp
1 1/2 Cups All purpose flour
1/2 tsp. Salt
1 1/2 Tbsp Melted unsalted butter, plus more for greasing the pan

Preheat the oven to 425. Grease a 12 cup muffin or popover pan with butter. Cover the edges in between as well. Using a nonstick pan? Butter it up!

In a large bowl whisk together eggs, flour, salt, milk and melted butter. Do not over mix but do ensure the batter is smooth and free of lumps.

One tip provided by Ina Garten is to place the pan in the oven for 2 minutes to preheat. I did this and they came out well so it is worth a shot.

Fill buttered pan with batter halfway up each cup.

Bake in center of the oven for 30 minutes. Make sure there is enough room for them to pop up without hitting the top of your oven or a higher rack. DO NOT open the oven once they go in. It will prevent them from “popping”. Sorry I yelled but apparently this is extremely important.

After 30 minutes remove from the oven and enjoy!

2 Comments

Filed under baked goods, Cooking

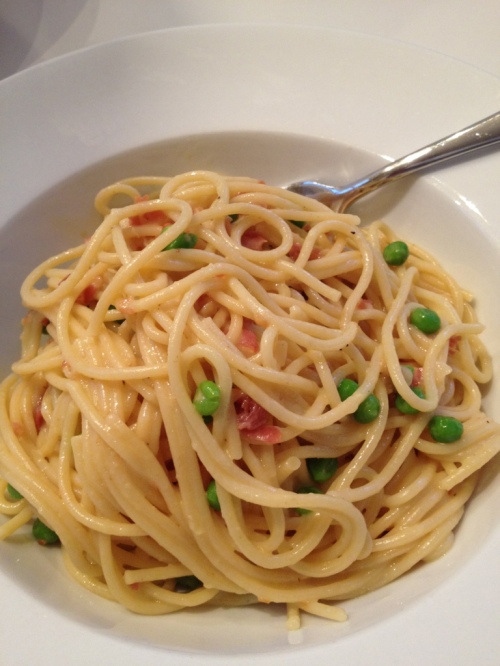
Pasta Carbonara

20130319-190002.jpg

Hello again my fellow foodies!!! It has been a ridiculously long time since I last posted some tasty goodness. I promise I’ve been eating just not cooking much that doesn’t involve rotisserie chicken. I could probably write a handful of posts on that amazing short cut ingredient alone. Anyway long story short I had a baby and cooking became and still sort of is another chore on the list instead of my pride and joy. (I have a new one of those and he is a full time job). So now that I’m finally getting my food groove back I’ll try to post more than once a year. Just in case anyone out there actually reads this. So without further ado I now present you with Pasta Carbonara! One of my favorite meals when visiting Italy hands down. Many versions I have had use cream and are a bit heavier. The real deal is so simple yet amazing! I keep the peas even though they are not an “authentic” ingredient.

Pasta Carbonara

1lb box Spaghetti
1 Cup finely grated Parmigiano-Reggiano cheese
1/4 lb Pancetta (thick or thin cut your choice. You can use bacon or guanciale)
3 Cloves minced Garlic
4 large eggs
1 Cup peas (fresh or frozen and add more if you like)
Fresh ground pepper

Boil and salt your water, cook the pasta according to your package instructions (approx 11 min)

Next, dice your pancetta into small cubes and sauté until brown over medium heat and sprinkle with pepper.
Remove the pancetta to a paper towel lined plate to drain. Leave the remaining grease in the pan to sauté the garlic and peas for 1-2 minutes. Add a few tablespoons of pasta water if there are a lot of brown bits leftover from the pancetta to deglaze the pan.

Whisk the eggs and parmesan together in a small bowl. Set aside. Before you drain the pasta save about 1 cup of the water for later. Drain the pasta and remove the pasta pot from the heat of the stove.

Now for the mixing and hopefully not making scrambled eggs step. Add the pasta back to the pot quickly. Gradually pour and toss the egg mixture until it is well mixed. Stir, stir, stir. Add in a little of the reserved pasta water as you go if it starts to get clumpy. Make sure you complete this step with the warm pasta do not drain it and forget it sitting in the sink for 10minutes (my mom brain assumes people do this from time to time).

Finally mix in the pancetta, peas and garlic. Sprinkle with pepper and serve with additional parmesan if you feel so inclined.

If you are paranoid about the egg feel free to return the mixed pasta to low heat but the heat from the pasta technically cooks the egg.

Heaven in a bowl!!!

Leave a comment

Filed under Uncategorized

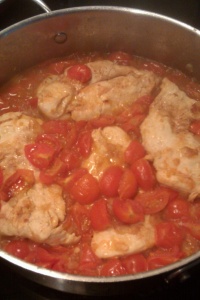
One Skillet Meal: Dort’s Bruschetta Chicken

Hello my fellow foodies!  I know, I know I fell off the blogging wagon.  I will try to be better… then again not sure if anyone actually looks at this regularly but if you do sorry about my hiatus.  This is a little something I pulled out of my sleeve a few years back and have been making fairly often.  The recipe came out of my head so it can be adapted easily to fit in your favorite spices and herbs if you want to add some pizzaz.  Hope you enjoy!

Bruschetta Chicken:

1 Package thin sliced boneless skinless chicken breasts (4 breasts)

1 Pint Grape or Cherry tomatoes

1/4 C. White wine

1/4 C. Chopped yellow onion

1-2 Tbsp. Olive Oil

2 Cloves of garlic, minced

Salt & Pepper

1 Baguette or bread of your choice

Start by cutting the tomatoes in half, in quarters if they are large.  Set aside.  Heat a saute pan on medium heat add olive oil.  Cook the onion until it is translucent about 3 minutes.  Sprinkle the chicken with salt and pepper on both sides.  Cook for 1 minute per side then add garlic, tomatoes and wine.  Cover with a lid and cook for approximately 5 minutes. (this varies greatly on the thickness of your chicken breasts)  If the chicken is cooked but the sauce in the pan has not thickened, remove the chicken, increase the heat and reduce the tomato mixture until it is no longer runny.  Return chicken to pan for a quick heat up and drizzle with balsamic if desired.  Serve the chicken with a few generous spoonfuls of the tomato mixture.  Plate it with the baguette and be sure to scoop up the leftover tomato mixture with your bread for some instant bruschetta!

*Tips- you can cut thin slices of the bread drizzle with oil and bake for 5 minutes to add more crunch.  Also, you can easily make this a hearty pasta dish by serving it over a bed of angel hair.  If you do that I would recommend more tomatoes/wine/balsamic so there is extra sauce for the pasta to soak up.  If you are watching your waistline, reduce the oil and take out the bread/pasta all together and you have a lean, low carb high protein main dish!

Leave a comment

Filed under Uncategorized

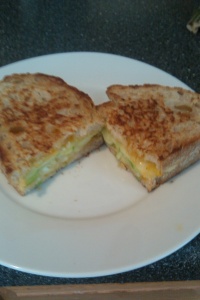
Apple & Brie Grilled Cheese

For anyone who knows me you probably guessed that I was watching Oprah yesterday when she had Martha on.  My two favorite icons in one place!  Martha did a segment on grown up grilled cheese, granted I had already seen all of this in her latest issue of Living but I still watched.  I was on my own for dinner last night and thanks to the show I was inspired to make my own version for dinner.  I ran to the store to pick up some essentials and I was headed on the road to cheesy goodness in no time. This is basically the same flavor profile as the baked brie that my mom serves at holidays and I continue to make whenever I have an excuse 🙂 Below I am only listing ingredients without quantities as I only made one sandwich.

Apple & Brie Grilled Cheese:

Granny Smith Apple- skin on sliced in to thin (1/8 in.) half moons

Crusty wheat or white bread

Brie Cheese (rind can be left on or removed)

Apricot preserves

Butter

Butter the outside of the two pieces of bread.  On the inner sides of the bread spread a layer of apricot preserves (on both sides).  Layer cheese on one piece of bread, add a layer or 2 or apple slices and another layer of cheese, sprinkle with salt & pepper if desired.  Top with the other piece of bread.  Heat a skillet to medium heat.  Cook the sandwich for about 1-2 minutes per side until the cheese melts and the bread is golden brown.  Slice and enjoy!

Leave a comment

Filed under Uncategorized

One skillet meal:Chicken sausage with apple and carmelized onion

  The inspiration for this one came from my Mom.  She was rattling off a recipe she saw in a magazine recently during one of our daily phone calls, I retained some of it and improvised the rest.  This is a very fall flavored meal that is quick and easy.  Give it a try and let me know what you think.

Chicken Sausage With Apple & Carmelized Onion:

Ingredients:

1 Package of “Al Fresco” Sweet Apple Chicken Sausage sliced

1/2 Vidalia Onion thinly sliced

1 very large or 2 small Granny Smith Apples diced

2 tsp. Olive oil

1 1/2 tsp. Apple Cider Vinegar

1 pinch Allspice

1 tsp. Maple Syrup

Salt & Pepper

2-3 Tbsp. water

Heat a large skillet on medium and drizzle with olive oil.  Add onions and cook for approx 5 minutes until they start to brown.  Slice sausage into 1/4-1/2 inch pieces and add to pan.  Cook for another 2-3 minutes until sausage is browned on both sides.  Add apple, salt, pepper, allspice, apple cider vinegar and water.  Cover and cook on low for approx 5 minutes until apples are fork tender.  Drizzle in the maple syrup for some extra sweetness before serving.  For more veggie content try adding some cabbage or serve with acorn squash to complete the fall feel.

*for the record it isn’t the best picture but I ate mine too fast and had to grab my husband’s bowl away from him to get the pic before it was gone 🙂

1 Comment

Filed under Uncategorized

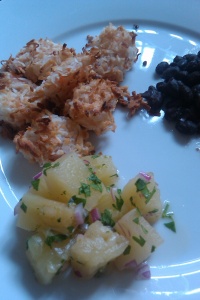
“Skinny” Coconut Shrimp with Pineapple Salsa

Who doesn’t love coconut shrimp?!  They are such a tasty treat but of course anything fried really is quite good.  Since I have been on a healthy eating kick lately I knew baking this dish would be a good start to cutting the fat.  After some scouring of the internet I found a recipe that was started by Weight Watchers.  I took it as a starting point and this is the end result.  I served it with a pineapple salsa and some black beans.  I must admit I failed big time on the salsa by using canned pineapple but I was being thrifty, it wasn’t bad but fresh pineapple would have made it GREAT!  The salsa would also be good with mango or peach too so get creative if you try this one out.  I know I will be trying out a few versions in the future. 


“Skinny” Coconut Shrimp

Ingredients:

1 1/2 Lbs. Shrimp – Extra large, defrosted, shelled and deveined, rinsed and patted dry(I used medium shrimp b/c that is what I had in my freezer I wouldn’t go any smaller)

1/3 C. Cornstarch

Pinch Salt & Pepper

1/3  C. Egg whites (2-3 egg whites)

3/4 C. Coconut (Shredded/sweetened I know not super healthy but you aren’t actually eating that much)

Pineapple Salsa:

2 C. Diced Pineapple

1/2 tsp. Lime Zest

1-2 tbsp. Lime juice

2 tbsp. Cilantro

2 tbsp. Red Onion-small dice

Preheat oven to 425° F. Lightly spray a large baking sheet with cooking spray.

 In a small bowl combine cornstarch, pepper & salt.  Beat egg whites in separate dish.

 Place coconut on a baking sheet and pre-toast it for about 3-4 minutes.

 Take each shrimp and first dip into cornstarch mixture, then in egg and finally roll in the coconut.  Your hands will get messy and you will need to pat the coconut onto the shrimp to make it stick.

 Place on the baking sheet. Bake 10-15 minutes or until shrimp is pink and the coconut is lightly toasted.  You may need to flip once half way through for even coconut toasting.

For the salsa combine all ingredients and store in the refrigerator until serving. 

Serve with canned black beans or rice to complete the meal.

Leave a comment

Filed under Uncategorized